Retul Fitting
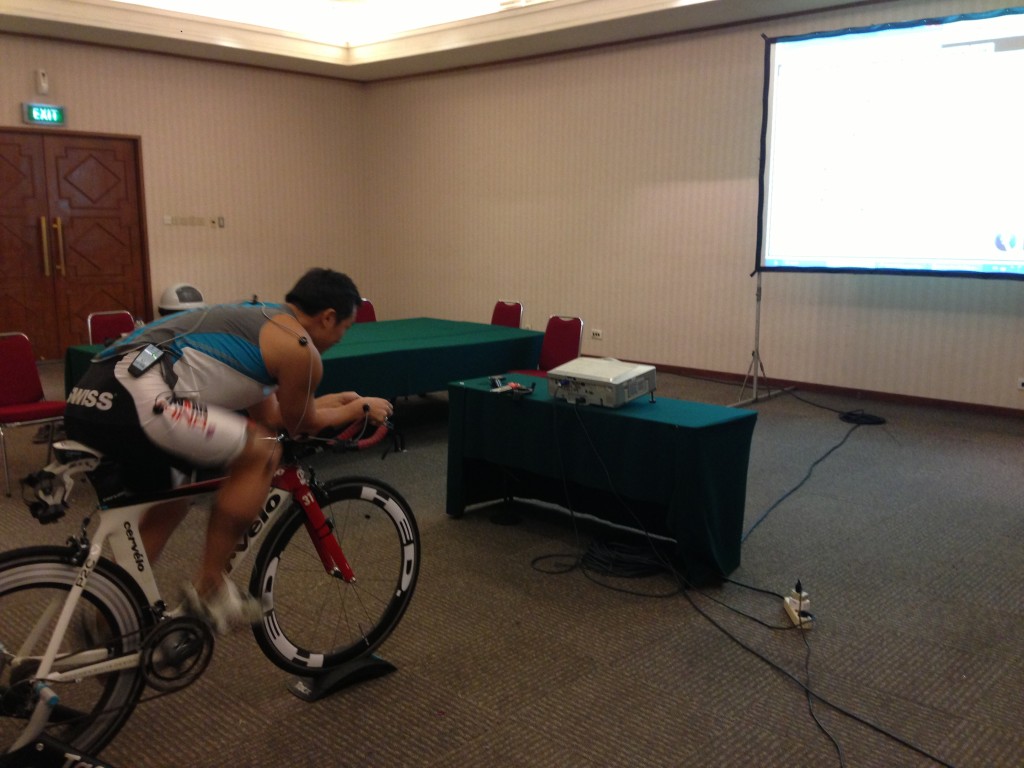
Last week had the opportunity to do a Retul Fitting for my bicycles. I was originally fitted on my P2C when I bought it at the Bike Boutique 5 years ago however after multiple disassemblies and changing of parts the original measurements and settings have long been lost. Given both a planned century ride on my R3 and the Ironman at the end of the year I thought it would be wise to invest into a proper fitting.
What is a Retul Fitting?
Bicycle fittings have come a long way from simply measuring the extended knee angle when seated on a bike. Retul is the cutting edge of bicycle fitting and they employ a data backed approach along with the skill and experience of the fitter to provide a fit that optimizes power, comfort and efficiency. Essentially, through the use of motion capture of sensors attached to key points on the rider’s body the Retul program captures multiple data points as you cycle for about 3 minutes. By comparing this data to optimal riding positions the fitter then makes adjustments to your bicycle to help achieve the best position. The whole process took about 2.5 hours for fitting both my bikes which included:
- A comprehensive history of my experience
- My goals for the fitting
- Stretch test
- Pre-fit monitoring
- Post-fit monitoring
What were the results and was it worth it?
Aside from the cool gadgetry, professional fitters bring experience and qualifications that can at a minimum help you with a more comfortable and efficient ride. However a bad fitting bike can also be a source for injury ending months of training in disappointment so in my opinion it is important that you are fitted properly if you regularly train on a bicycle.
However side from the adjustments to fitting the monitoring tools also provide an interesting insight into the efficiency of your cycling. For example I discovered that I have a tendency to lift my heels which puts undue strain on the calf muscles. This could be caused by a previously ill fitting bike (for example with a seat post too high). An additional monitor also shows a horizontal trace of your knee movement. lateral movement of the knee is also inefficient and was some tangible evidence that I need to work on improving my pedal stroke mechanics.
Given my plans for a full Ironman at the end of the year and that I’ll be spending anywhere from 5-10 hours on my bike each week. I think that the fitting was worth it. I fit both my bikes for about US$450 and a single bike fit would have cost US$300. Also once you have done the fitting you have a comprehensive report with every measurement on the bike that you need to ensure a proper fitting every time you assemble the bike.
Below is an except from my fitting notes!
DURING-FIT NOTES
Changes during fit: Neutral cleat position.
R3
- (1) Saddle moved down 8mm.
- (2) Saddle moved forward 1mm.
- (3) Handlebars moved down 7mm.
P2
- (1) Saddle moved down 8mm.
- (2) Saddle moved forward 15mm
- (3) Armrest pad from up to level.
POST-FIT NOTES
Recommendations:
R3
1) Change to straight seatpost and move setback forward by 5mm.
P2
1) Change aerobar extension to allow arms to rest properly on armrest pad, and have a ski bend extension for more natural wrist position. 2) Swap crankset between R3 and P2, 165mm on P2 and 170mm on R3.
Stretching that hamstring and hip flexors. Relax ankles and drop heels.


